Unlike the previous versions of Windows operating system, you can't disable updates in Windows 10. Updates are necessary and covers crucial security fixes. Updates can be of large size and it may completely take the Internet connection. And if you're on a slow Internet plan then it'll take forever to download the updates.
Although Microsoft have given an option to enable metered Internet connection (for Wi-Fi users), which will prevent Windows from downloading the Updates but there isn't any option to disable it for non Wi-Fi users.
There are many ways to disable the updates. I am sharing the following four ways:

That's all for today. Use any of the above method working for you. Follow the Method 1 and Method 3 to disable the Windows Updates if its working for you. It is not recommended to disable the updates as it contains important updates and security fixes.
Although Microsoft have given an option to enable metered Internet connection (for Wi-Fi users), which will prevent Windows from downloading the Updates but there isn't any option to disable it for non Wi-Fi users.
There are many ways to disable the updates. I am sharing the following four ways:
- Disable Updates using Group Policy Editor. GP Editor is not available in Home edition and therefore this method will not work in Home edition of Windows 10. Follow second method instead.
- Disabling Updates using Registry Editor. If you don't know or you don't want to manually change the value then I have provided ready-made registry script. SeeSection 2 of the second method below.
- By enabling metered Internet connection. This option isn't available for non Wi-Fi users.
- By disabling Windows Update service. Follow this method if none of the above method worked for you.
Method 1
Although Microsoft have disabled all the built-in method to disable automatic updates, you can still customize the updates using the old Local Group Policy Editor.

Note: This method will not work in Windows 10 Home Edition. Follow the second, third, and fourth method.
It is recommended to follow this method if you're using OS other than Home edition.
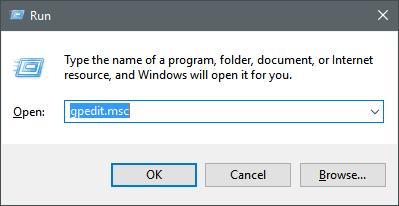
- Press Win + R key to open RUN dialog box and type "gpedit.msc" [without quotes] in the given text field in RUN. It'll immediately open the Group Policy Editor.

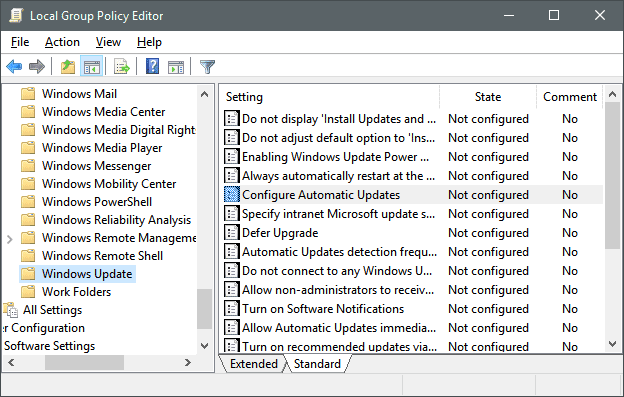
- Now navigate to: Computer Configuration > Administrative Templates > Windows Components > Windows Update.

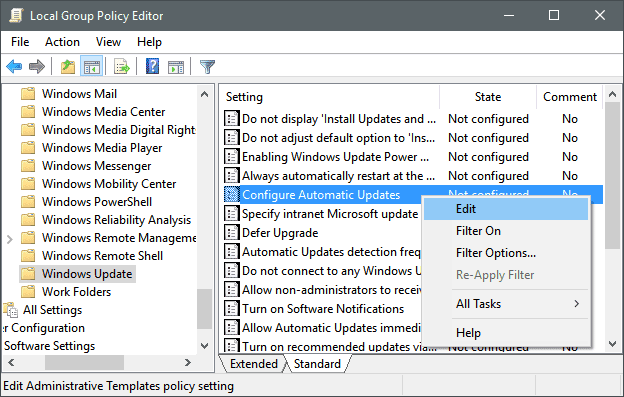
- Now look for "Configure Windows Updates" setting in the right side panel. Right click on it and select "edit". It'll open "Configure Automatic Updates" Settings Window.

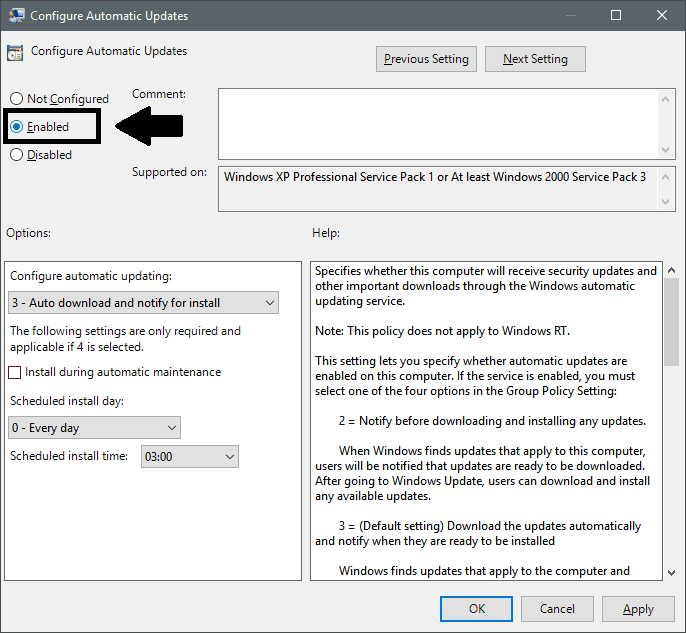
- In the "Configure Automatic Updates" settings Window, click on the "Enabled" radio option to enable it. It'll enable the Options section.

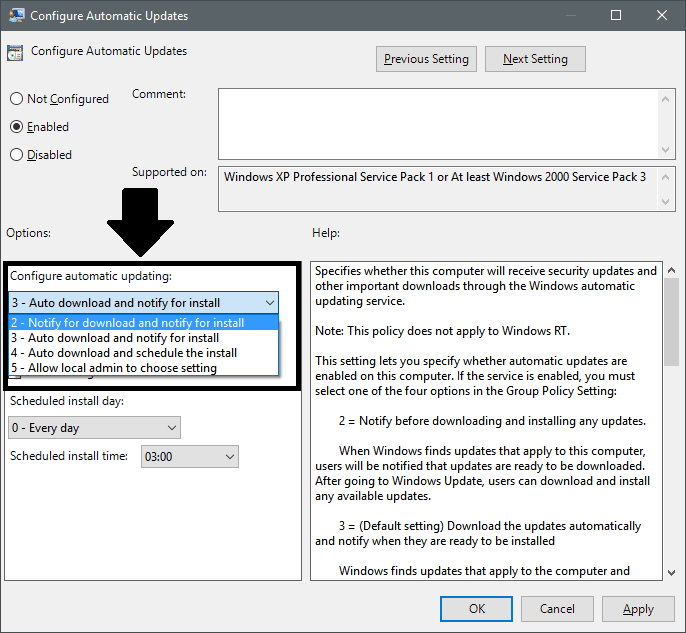
- Now select any of the following options from the drop-down menu given below "Configure automatic updating " option. See screenshot given below.

It is recommended to choose the "Notify for download and notify for install" to make the Windows to prompt you before downloading updates. It'll not download the updates automatically.
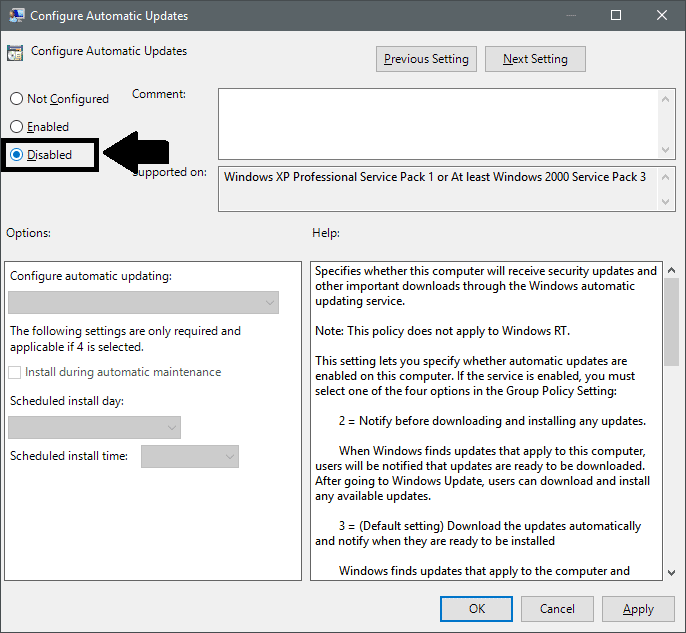
- Click on the disabled radio option to completely prevent Windows for checking for updates. It's not recommended.

- Click on the Apply button to save the changes and then click OK. Now you can close the Group Policy Editor.
- Now go to Settings > Update & Security and click on "Check for Updates" button.

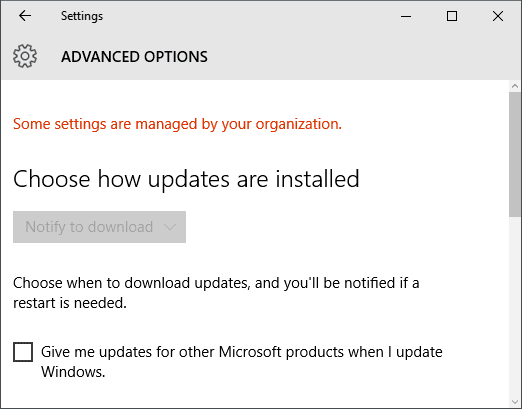
- That's it! Check the new settings by clicking the Advanced options link.
Method 2
Follow this method if you're a Windows 10 Home Edition user. We'll use Registry Editor to accomplish our task.
Section 1: If you're comfortable customizing the registry manually then follow this section, otherwise follow Section 2.
- Press Win + R key to open RUN dialog box and type "regedit" in the given text field and press Enter. It'll open the Registry Editor.
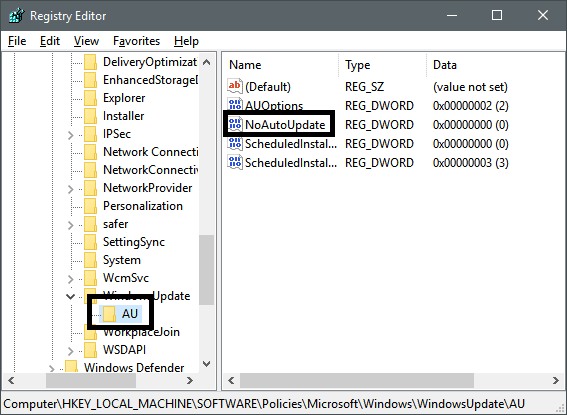
- Now navigate to HKEY_LOCAL_MACHINE > SOFTWARE > Policies > Microsoft > Windows > WindowsUpdate > AU.
- Now create a new DWORD with name NoAutoUpdate and set its value to 1.

- Close the Registry Editor and Check for Updates from the Settings to force the changes to take effect.
- Done.
Section 2: If you're not familiar with the Registry Editor or you're too lazy to modify the changes then you can download the ready-made registry script to do the task automatically.
- Go to this link and download the ZIP file containing the Registry script.
- Extract the ZIP file and open Disable Automatic Updates file by double clicking on it.
- It'll prompt your before modifying the changes. Allow it.
- Done!
Method 3
if you use Wi-fi connection to browse the Internet then you can enable the Metered Connection. Enabling the Metered the connection will prevent Windows from downloading the updates.
- Connect to the network that you want to set as a Metered Connection.
- Open Settings and go to Network & Internet setting.
- Click on the Wi-Fi in the left pane and then click on the "Advanced Options" link under the Wi-Fi section.
- Now set the slider to On under the "Metered Connection" section.
- That's it! Now Windows will not download the updates automatically as long as you're on a Metered Internet Connection.
Method 4
Follow this option if none of the above method worked for you. This option will work for sure.
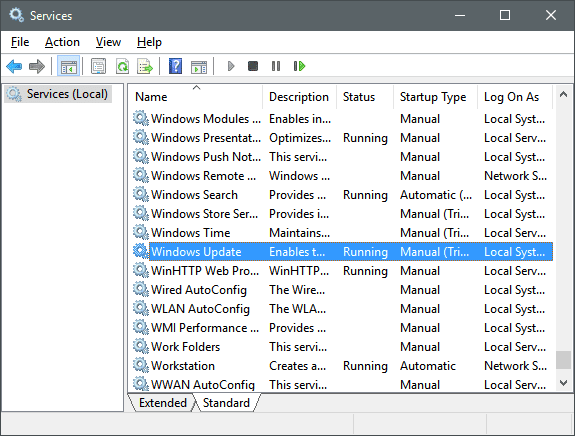
- Press Win + R key at the same time to open the RUN dialog box and type "services.msc" in the given text field, then press Enter. It'll open the Services Manager.
- Scroll down to the bottom until you see the Service with name Windows Update in the list.

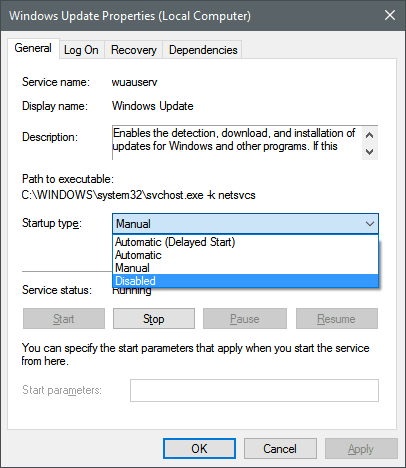
- Double click on the Windows Update service and set it startup type to Disabled.

- That's it! Now Windows will give you a error message whenever you try to check for updates. Change the startup type to manual to enable the update again.
That's all for today. Use any of the above method working for you. Follow the Method 1 and Method 3 to disable the Windows Updates if its working for you. It is not recommended to disable the updates as it contains important updates and security fixes.